Depending on which channel you have joined, you will be prompted to install the pending updates. The problem with Windows updates is that they require to restart for installation. Although you can ignore the Restart prompt on Windows 11, what about setting up Active hours to let Windows know when you’re typically at your PC? Just like Windows 10, Windows 11 also lets you set an Active Hours.
What are Active Hours in Windows 11?
Active Hour is a feature that lets you set a time range to let your PC know when you are using your device. At that time, your PC won’t restart automatically. The feature is meant to prevent sudden restarts during Windows updates. For example, if you set Active Hours, you will prevent Windows 11 from restarting your PC automatically to install the updates. Also Read: How to Install the New Windows 11 Photos App Right Now!
How to Configure Windows 11 Active Hours
It’s pretty easy to set up Active Hours in Windows 11 operating system. You need to follow some of the simple steps given below. So, let’s check out.
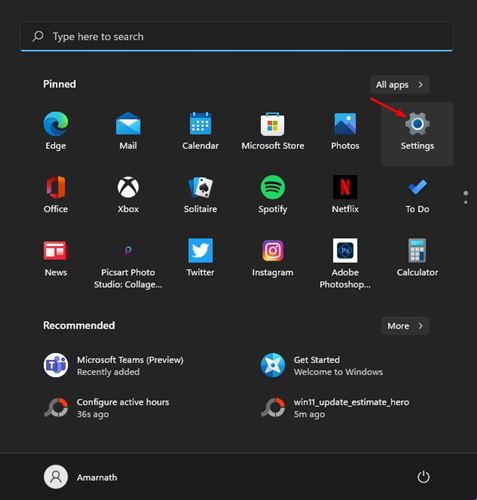
First of all, click on the Windows 11 Start button and select Settings.
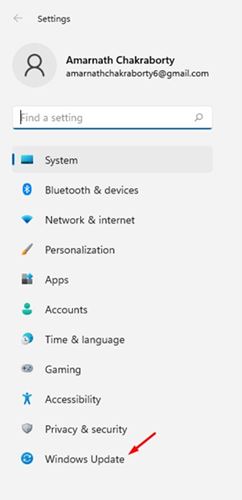
On the Settings page, click on the Windows Update button as shown below.
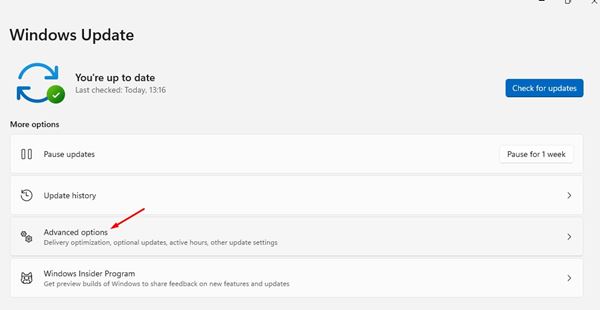
Click on the Advanced options on the right pane, as shown in the screenshot below.
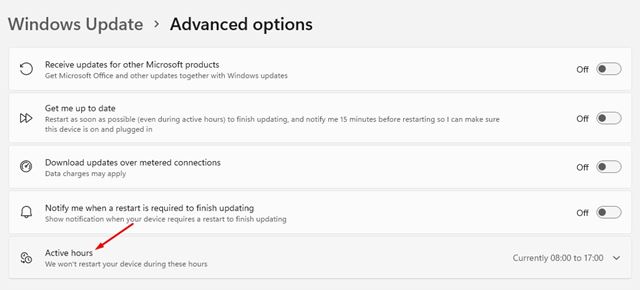
On the next page, click on the Active hours option.
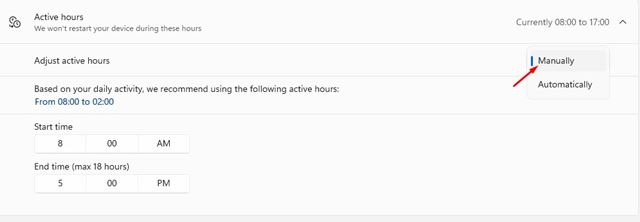
Expand the Active Hours option and select Manually under the Adjust active hours.
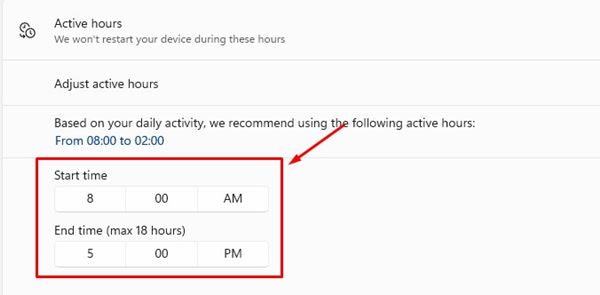
Now you will be asked to set the Start and End time. The max you can set is 18 hours.
That’s it! You are done. Now Windows 11 won’t restart your device during the set hours. So, this article is all about how to set up active hours in Windows 11. I hope this article helped you! Please share it with your friends also. If you have any doubts related to this, let us know in the comment box below.
